Showing posts with label DIY. Show all posts

Tuesday, November 5, 2013

Noelle's First Halloween!

As soon as I knew I would be having a Fall baby, I immediately began thinking about Halloween costumes. Halloween has always been one of my favorite holidays and it would be Noelle's first holiday. Jeff and I always have some sort of ridiculous couples costume so we knew we needed a family costume this year, especially since it was Noelle's first. Thankfully, Jeff doesn't think this is silly and we usually start plotting and making our costumes early in the season.

When I started looking for baby costumes, I ran into two issues. Halloween costumes for small babies tend to be sized 0-6 months and expensive. I think a six month size range is pretty ridiculous, especially considering our little peanut is still wearing some of her newborn clothes. I'm also not a fan of spending a lot of money on a costume that will be worn once and most likely be way too big. Of course, regardless of this, I still began to stress out that she needed the perfect costume. On Halloween, my niece comes up to trick or treat in our neighborhood and I knew that Noelle would be staying home to pass out candy with Daddy, since it was supposed to be rainy. The weekend after Halloween we had a costume party to go to, so I knew that she would eventually need a costume. It was the perfect recipe for stress for a type-A, first time mama.

It all worked out and our little pumpkin had a great first Halloween.


Our bigger pumpkin isn't the biggest fan of being dressed up. He has his 'Mom, you're embarrassing me' look totally down.


Daddy is the sweetest and carved a very special pumpkin for our girl.


And our first Halloween as a family of 3 was a success! Just a couple of farmers with our sweet chicken.


We have called Noelle, little chicken, since she was born so naturally it was the best costume choice.

Have you seen a cuter chicken?! Doubt it!

This was such an easy costume to make. I found some DIY chicken costume tutorials online, but again they all seem to be geared towards bigger kids and use feather boas. Let me just say that feather boas are the most annoying things ever. I bought one to try and there are feathers everywhere just from having it in the bag and I didn't even take the tag off of it. So I improvised a bit so that my chicken would be comfortable and I will be returning the boa. I used a hot glue gun to glue single feathers to the front of a long sleeve onesie. I originally used spray adhesive but it left a heavy chemical smell on the onesie and I couldn't have her hanging out in that all night. So now I have two feathered onesies, live and learn. I bought a pack of plain headbands and used the white one to glue red feathers to. I actually used a peacock feather that had a wire in it, removed the peacock feathers, keeping just the red ones, and used red felt to position it and hot glue it to the headband. My mom picked up orange pants and also gave her Halloween socks, which we reused for this costume. SO simple! The whole thing took less than 15 minutes to put together and cost under $10.

Noelle's first holiday was a success! Even though time needs to slow down, next year will be so much fun when she can walk around to collect candy that her mom & dad will eat. Hope your Halloween was just as fun and that you are getting to eat all your kid's candy!


Monday, August 19, 2013

DIY wine basket and going to the liquor store pregnant

This weekend we were overbooked and loving it. We had a jam-packed weekend that included a trip to the liquor store with my big belly and perhaps a broken rib. Maybe I'm exaggerating but maybe I'm not.

Friday night, Jeff and I had big plans to watch The Godfather. I'm probably in the 1% of Americans that have never seen it. Apparently Mobweek was right after Sharkweek and Jeff was totally into it. I couldn't really follow the movie but I definitely didn't hate it. With commercials, it was SO long and we ended falling asleep early but not before I got in some snuggles with my favorite cuddlebug.


Saturday, we had a family cookout during the day and a couples bridal shower at night. I loved spending time with my family and wish I could move away from the buffalo chicken dip long enough to take a picture or something. When we got home, we literally had about 20 minutes to get back out the door for the shower. It was set up more like a wedding, with cocktail hour, a meal, and a DJ. Such a fun time but still so weird to watch everyone drink and party while I need to sit down with my feet up. My cankles made an appearance late night so we had to bust outta there. Thankfully, they had some yummy food, a serious dessert spread, and gorgeous cake. Why drink when you can eat?


Earlier in the day on Saturday, I made my first trip to the liquor store in almost 9 months. Ironically, my last trip to the liquor store was the same night I bought a pregnancy test. After I bought my favorite fall beer, I had this overwhelming feeling that I shouldn't drink it and should buy a pregnancy test instead. Glad I listened to my instincts and that pumpkin beer is still sitting in my fridge waiting for baby to make her appearance so mama can have a bevy. 

So, the reason for the trip... I made a wine basket for the couple and had been putting off actually buying the wine because I felt pretty uncomfortable doing a packy run with my big ole' belly. Much to my surprise, not a single person even gave me a second glance. Let me elaborate, I was waddling up and down aisles and aisles of booze, resting four bottles of wine and a few nips on my almost 9 month pregnant belly, and no one thought it was strange. I actually live in a pretty normal, middle class town and I'm not really sure why this was acceptable. Not that I want anyone judging me but I was ready to let the world know that I was making a wine basket, not binge drinking in the parking lot. Considering the looks and comments I hear all the time when I'm just minding my own business, I thought for sure I would get one while buying alcohol. It must be a more laid back crowd in there.

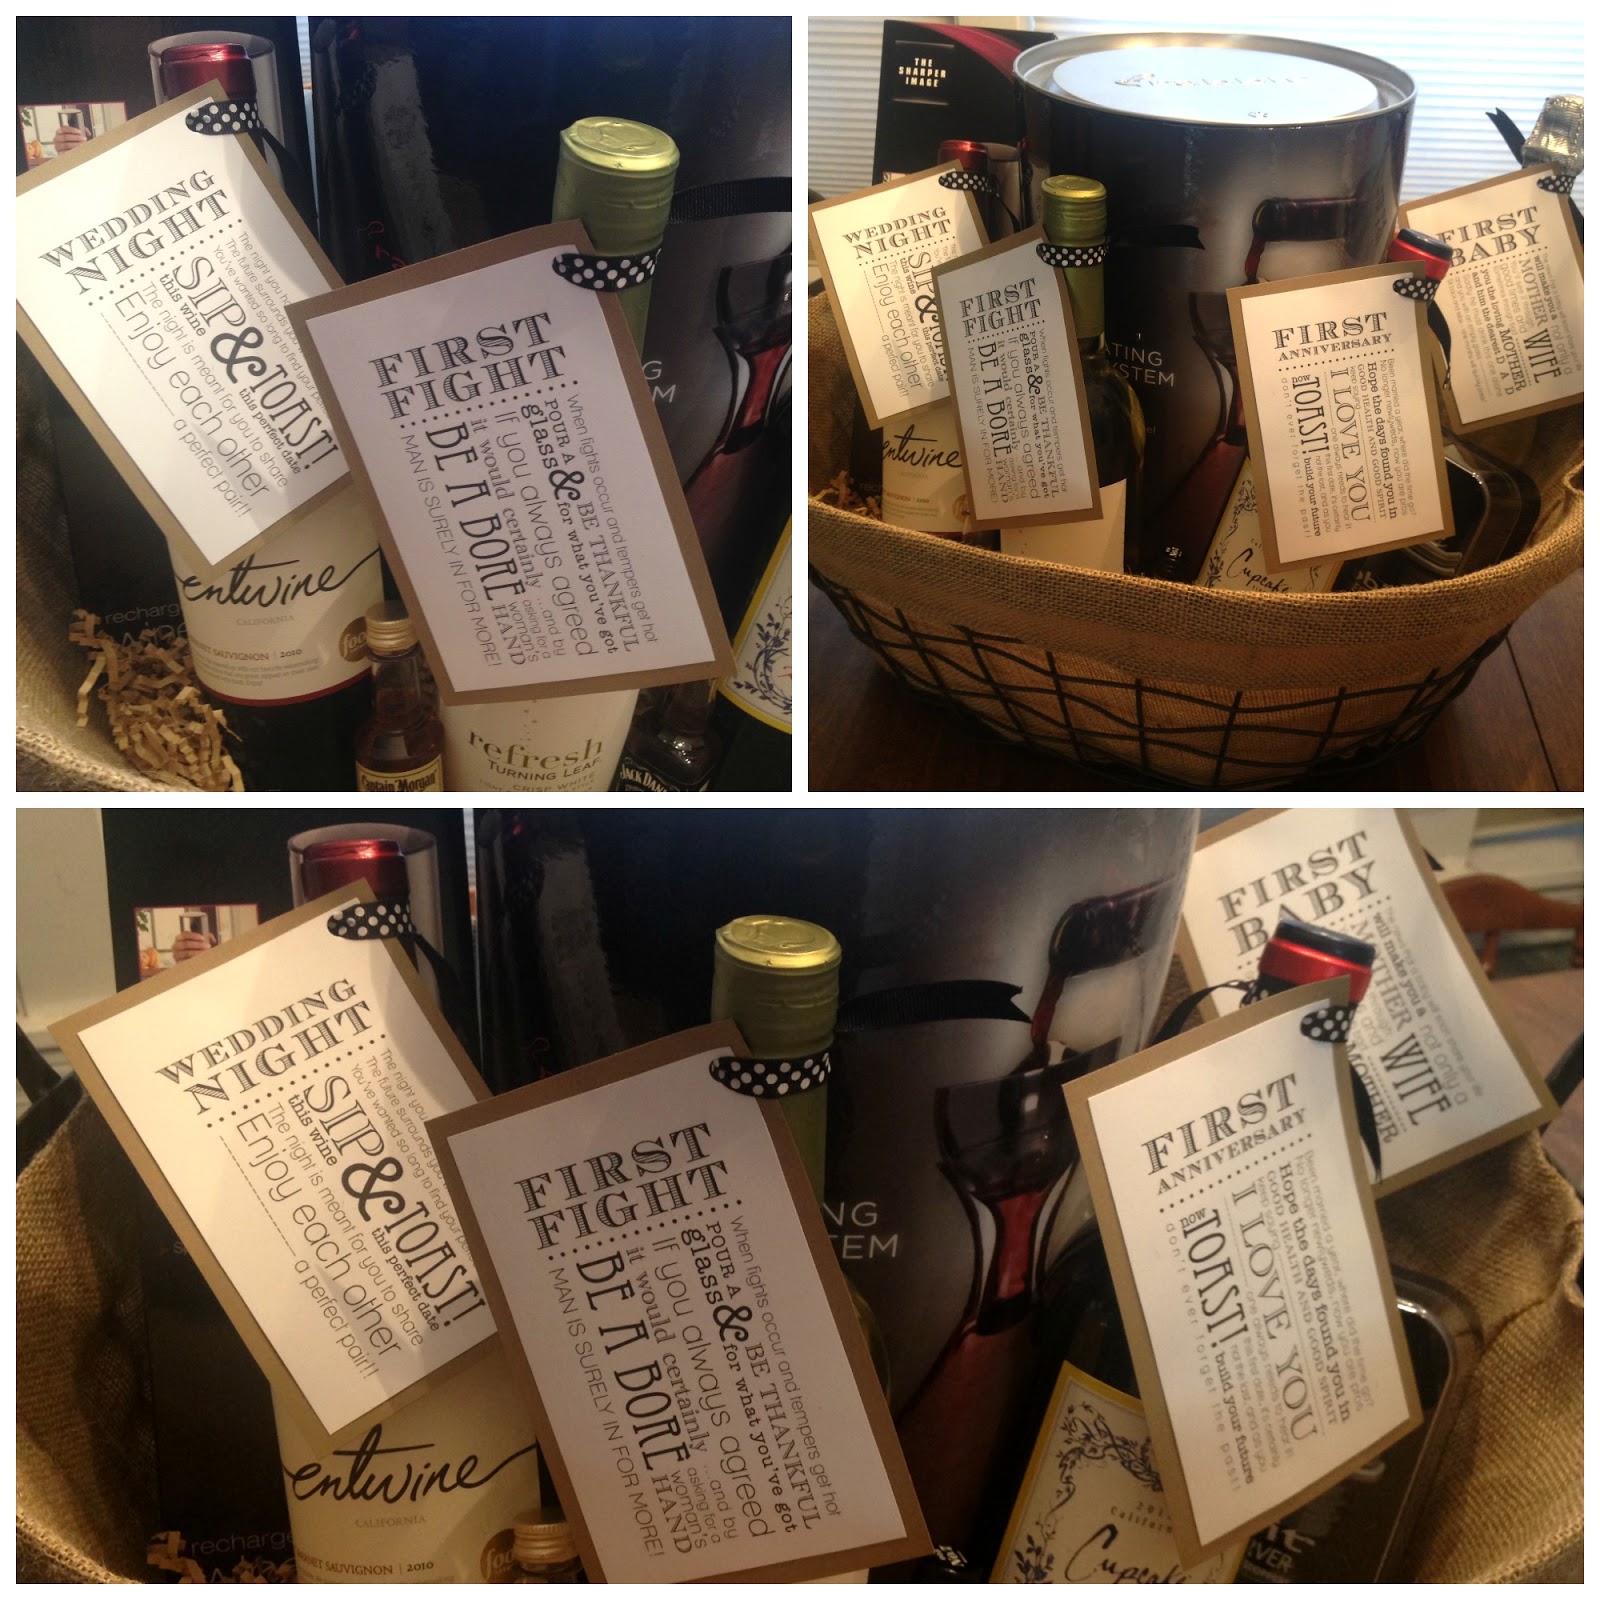
Anyways, of course Pinterest helped me with the wine basket and this is what I came up with.


This couple registered for a few wine accessories but must already have glasses, so I was able to add a few bottles of wine with free labels that can be found here, and pack it all in a fab basket found at Homegoods. I printed out the labels in black ink on white card stock and glued them onto brown craft card stock paper, tying it to the bottle with ribbon. I only used four labels, instead of the six, since this couple has been together already for over ten years and I felt these would fit best for the first year of marriage. 

I tried to pair the labels with wine that had names that kind of matched it. I used Wedding Night with Entwine cabernet, First Fight with Turning Leaf Refresh and also paired two nips, Jack Daniels and Captain Morgan for the hubby, First Anniversary with Cupcake Red Velvet, and First Baby with Fre Alcohol Removed sparkling wine. 

The basket was super easy to put together since I ordered the accessories from the couples registry and the labels took about ten minutes to print, cut, and assemble. It was also a big hit at the shower. I love making gifts that are personalized but also appreciate when people use the registry so I try to mix the two.

Sunday, we were supposed to go to a Christening but on Saturday night, I started having some rib pain and by Sunday morning, I sneezed and thought I was going to die. It feels like one of my ribs is broken.  I know that baby girl has been all up on my right side and in my right rib but holy moly this thing HURTS! I'm still 5 weeks out and if this is what it feels like when people say that their baby has a foot or something in their ribs, well then I might not make it. I was pretty immobile yesterday and found relief sitting in a certain position, so I worked on some curriculum and planning for my maternity leave. Of course, I googled my symptoms and diagnosed myself with a broken, fractured, or bruised rib. Damn you Google!! The pain has actually subsided quite a bit, so I'm pretty sure I'm just overreacting but it hurts!

Rocky gets a break from following me. Can you stand his wrinkly forehead?!


Now it's Monday and school starts in ONE WEEK! so I have a million things to do for baby girl and for my other babies so I'm going to get to it!

Happy Monday, loves!


Sami's Shenanigans


Saturday, December 31, 2011

My first Pinterest inspired craft

Like the rest of the blogging world, or maybe even the regular world, I've been pretty much obsessed with Pinterest for a while now. I endlessly pin crafts I don't have time for, home decor that I don't have the space for, baby pictures that I don't have babies for, and wedding inspiration that I don't have the money for. It is a beautiful way to de-stress. It has really been a God-send while working on my grad school work because it is the perfect way to unwind in between assignments. It is so mindless that it's genius. Not like my reality TV addiction because my DVR is too full for it to be an in-between-assignments thing.

Anyways, two of my very best friends in all the world got married this year and since I save every invitation/thank you card/note card/etc on my french memo board, I knew this would be the perfect Christmas gift for them. We don't usually do Christmas gifts but I knew I would make an exception for this craft.  Here is the Pinterest version...

baby ornament or wedding ornament

Here is my version...


{thank goodness for Burt's Bees hand creme for Christmas!}

While some might say they may not be as lovely as the original, I thought they came out fabulous. {There are more pictures of the cream one because all of the other pics show last names & I don't think my friends want me blasting their last names on the blog} I love that you can see snippets of important information.

I did have a couple of issues, which would be something to consider if you are going to try this. First the ornament is a standard sized ornament, which ended up being kind of small. I searched everywhere for a larger one with no luck. Second, every ribbon I used look ginormous (probably due to the small ornament), so I left it out. I think that the fact that I did this craft around Christmas, when all the ribbons are mega sized didn't help. I wanted to find a charm that said "2011" but that was hard to find, too. Since I'm kinda OCD with this stuff, if I find a charm, I will totally ask for the ornament back to update it. :) This was super easy, though. Here's what I did.

1. Cut the invitation into strips, keeping the important info. intact.
2. Curl the strips around a pen to give it some body.
3. Insert the strips into the top of the ornament (after removing the metal piece, which pops right off) strategically. I kept "less important" information in the middle and then wrapped the names and dates around the edges. I also didn't use every strip, but used all strips with information on them.
4. Put the top back on. I wanted to use ribbon and charms but I put it on my tree with a hook and it still looked awesome.

I plan on doing this with my own invitation and it was such an easy craft that I can see myself making them with birth announcements, wedding invitations, first birthday invitations, and any other important document that you would want to highlight at Christmas time. My friend Kristin said it was the best Christmas gift that she got and considering she also got an iPad, I'd say it was a success!